The Graphics Interchange Format (GIF) is a digital image format used to store bitmaps. Since it was introduced in 1987, it has been largely used on World Wide Web to allow websites to include images in their pages. It is an efficient format because:• is limited to 8-bit indexed color
• it has a good compression rate, reducing the size of an image
• preserves the quality of an image maintaining an efficient rate between image quality and file size
• it supports images with transparency zones
• it supports image based animation
Since 1996, a new format, Portable Network Graphics (PNG) was designed as a replacement for the GIF because:
• Lempel-Ziv-Welch (LZW) data compression algorithm—used in the GIF format—had been patented by Unisys
• provides better quality as PNG includes lossless data compression
• can achieve greater compression than GIF
• supports color depths as 24-bit and 48-bit;
But, since PNG does not supports animation (only via unofficial extensions), the GIF format remains the only option to include simple animation (not Flash or video) in a Web page. All major web browser can interpret and show an animated GIF.
Animated GIF are files that contain more than one image. Each image (frame) is shown in a loop for a limited period of time, thus creating the impression of animation. Animated GIF’s are a simple alternative to other types of animation, that are based on Flash, movies, Silverlight technology or Flex. It can provide cool effects.
In order to create an animated GIF in Photoshop CS3 or CS4 we will:
1. Open a new image and define its dimensions (let say 300 x 300 pixels and 8 bit color). Later, the image size can be modified using the Image -> Image size option from the Photoshop menu.
2. Activate the Photoshop Animation editor with the Window -> Animation option. For an Animated GIF, the animation editor must be set to frame animation and not to timeline mode because we want to design each frame;
3. Create the first image. Implicitly, this will be the first frame. Use layers to separate the image components. In order to make a flashy badge, we will:
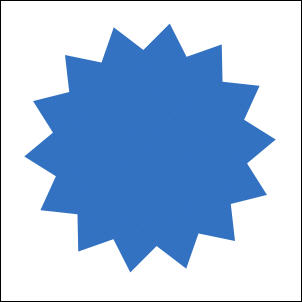
- a. insert a new layer (named Badge) and make a simple badge using Polygon Tool with the options: check Star, set indent sides by 20%, 14 sides; before making the badge background do not forget to select the foreground color;
- b. If you want to design the badge on the entire image with equal width and height, keep Shift key pressed (on Windows) and start designing from the center of the image
- c. insert a new layer and put the text Welcome to on it
- d. insert a new layer and put the text it& c solutions on it
- e. for this example, there will be 4 layers (Background, Badge and 2 with text)
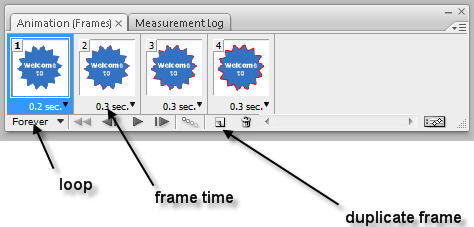
4. Duplicate the first frame. For this example we need 3 more frames.
5. In order to change each frame and generate different images we can use layer visibility and layer styles and effects. We avoid modifications made to the content of a layer, because these modifications are visible on all the frames.
6. The first frame has the following properties and effects:
• Badge layer is visible
• the Welcome to text layer is NOT visible
• the it&c solutions text layer is NOT visible
7. The second frame has the following properties and effects:
• Badge layer is visible
• the Welcome to text layer is visible
• the it&c solutions text layer is NOT visible
• Badge layer has a Stroke effect with size:1px and color red
8. The third frame has the following properties and effects:
• Badge layer is visible
• the Welcome to text layer is NOT visible
• the it&c solutions text layer is visible
• Badge layer has a Stroke effect with size:3px and color red
9. The fourth frame has the following properties and effects:
• Badge layer is visible
• the Welcome to text layer is NOT visible
• the it&c solutions text layer is visible
• Badge layer has a Stroke effect with size:5px and color red
• the it&c solutions text layer has a Stroke effect with size:3px and color red
10. In the animation panel, we make some settings:
• the animation is set to loop forever
• each frame is shown for 0.2 or 0.3 seconds
11. Delete the Background layer to generate a transparent one
12. In order to save the project as an animated GIF, we use the File -> Save for Web and Devices option from the Photoshop menu.
13. Open the animated GIF with a browser or put it inside a HTML page


lovely, i just added up another emo backgrounds for my blog
http://tinyurl.com/yalm758